Patterns using Image Trace in Illustrator
In Photoshop
Crop your pattern (or forms)
Eraser
⌘ L
Image > Adjust > Layers
Make a high contrast image from your pattern
Save, then import into Illustrator
In Illustrator
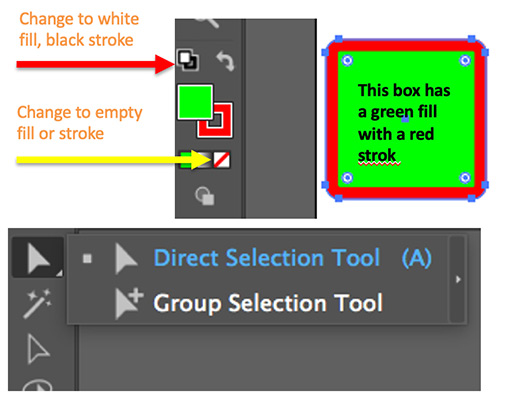
The top tool are the selection tools
Direct Selection: Selects part of a shape (don’t use this)
Group Selection: Selects one shape inside a group
Selection tool (V): Selects a shape or group
Useful Shortcuts
⌘ 0 (zero) Fit Page on screen
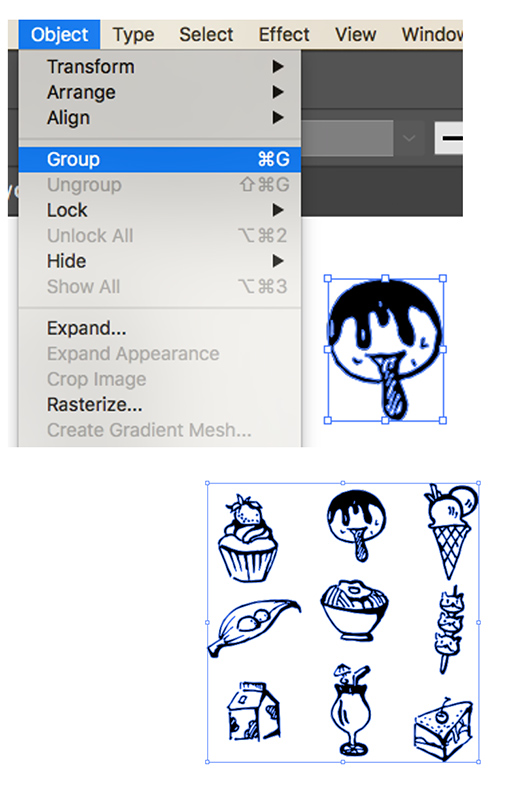
⌘ G Group
⌘ ⇧G Ungroup
⌘ [ Move Behind
⌘ ] Move in Front
⌘ ⇧ [ Send to Bottom
⌘ ⇧ ] Send to Top
Converting your pixels to vector
Window > Workspace > Reset Essentials
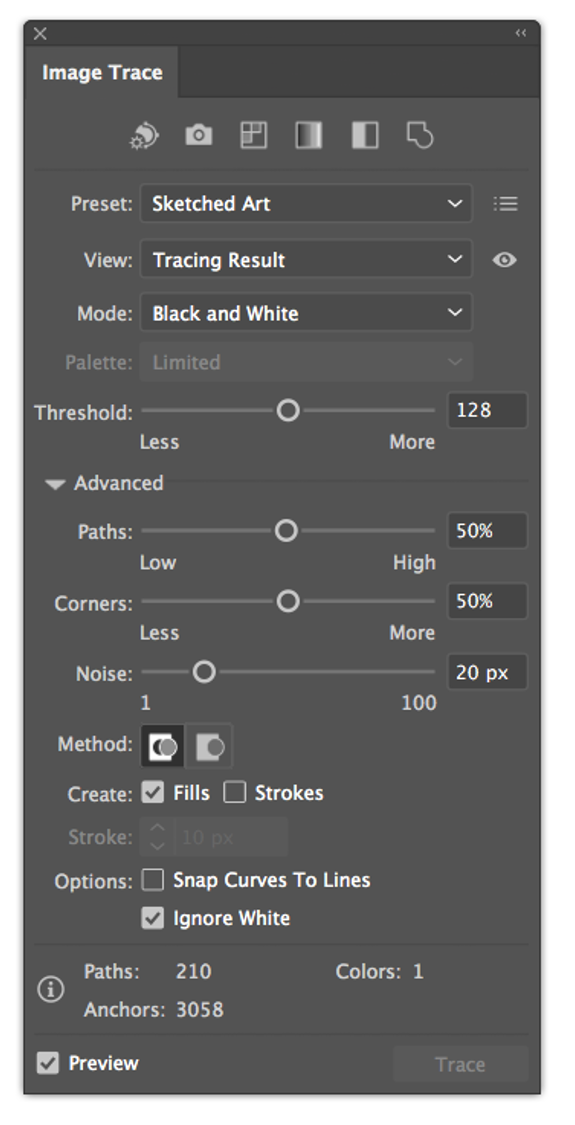
Window > Image Trace
Select your image using the selection tool (V)
Click on the advanced options
Select Ignore White
Experiment with Presets. Sketched Art seems to give good results
Make sure Mode is Black and White
Making Shapes
Use the select V tool to select your image
Object > Expand
⌘ ⇧G Object > Ungroup You may need to do this three times
Now click and drag around each form.
⌘ G Object > Group to group the all the shapes within the form
Move your shapes together into a square-like shape
Click and drag around all your shapes to select them all
Making Patterns
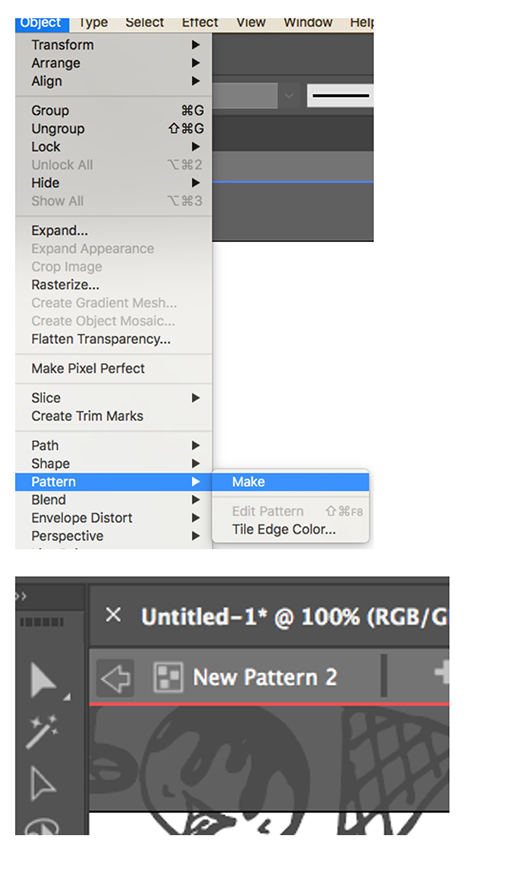
With all your shapes selected go to
Object > Pattern > Make
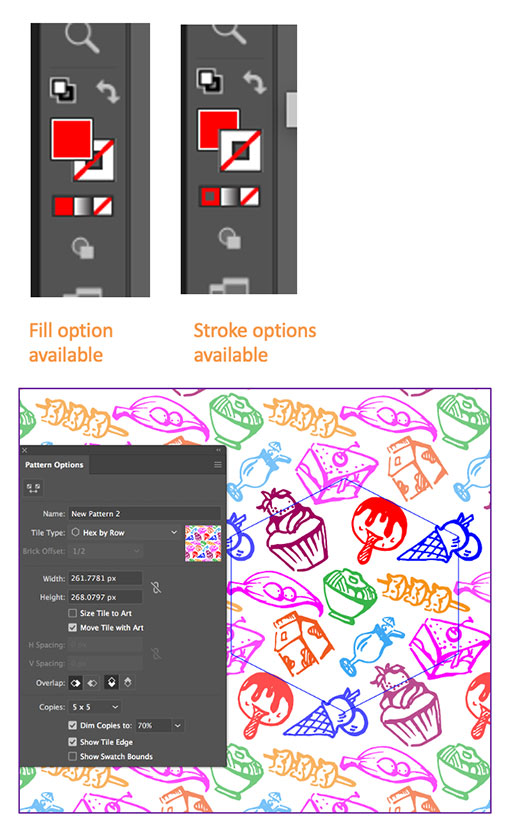
With your selection tool V , you can move your shapes around.
You can also use Scale S to make bigger/smaller and Rotate R
When using scale, use the Shift key to keep in proportion
When you are finished, click the exit pattern arrow button in the top left hand corner
Using your Pattern
Select the rectangle tool M
Click and drag to make a rectangle
Make sure your fill option is on top of the stroke option
Go to Window > Swatches
Click on your pattern swatch to fill your shape with your pattern
To edit your pattern, double click on the pattern swatch
Experiment with colours, tile type and sizes